Battle of Megiddo

Map of Megiddo battlefield.

Palestine-WW1

Map showing Allenby's final attack at Megiddo, September 1918.

Battle of Megidda 1918.

Megiddo / Nablus Savaşı, 7. ve 8. orduların imhası - 21 Eylül 1918
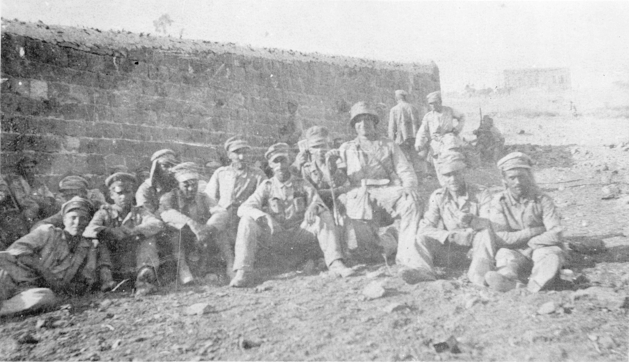
A group of German prisoners captured during the fight at Semakh on the Sea of Galilee.

Megiddo Division in Battle of Megiddo (1918) WW1. Army School of education India (1935-36) Winners of the Kashmir Cup tournament( Hockey)

The Battle of Megiddo, September 1918: Turkish carts and gun carriages destroyed by British aircraft on the Nablus-Beisan road in Wadi Fara.

Map showing the dispositions of forces at the start of the Battle of Megiddo in 1918

The Advance through Palestine and the Battle of Megiddo: Men of the 2nd Battalion Black Watch in a trench on Brown Ridge after the action at Arsuf on 8 June 1918.
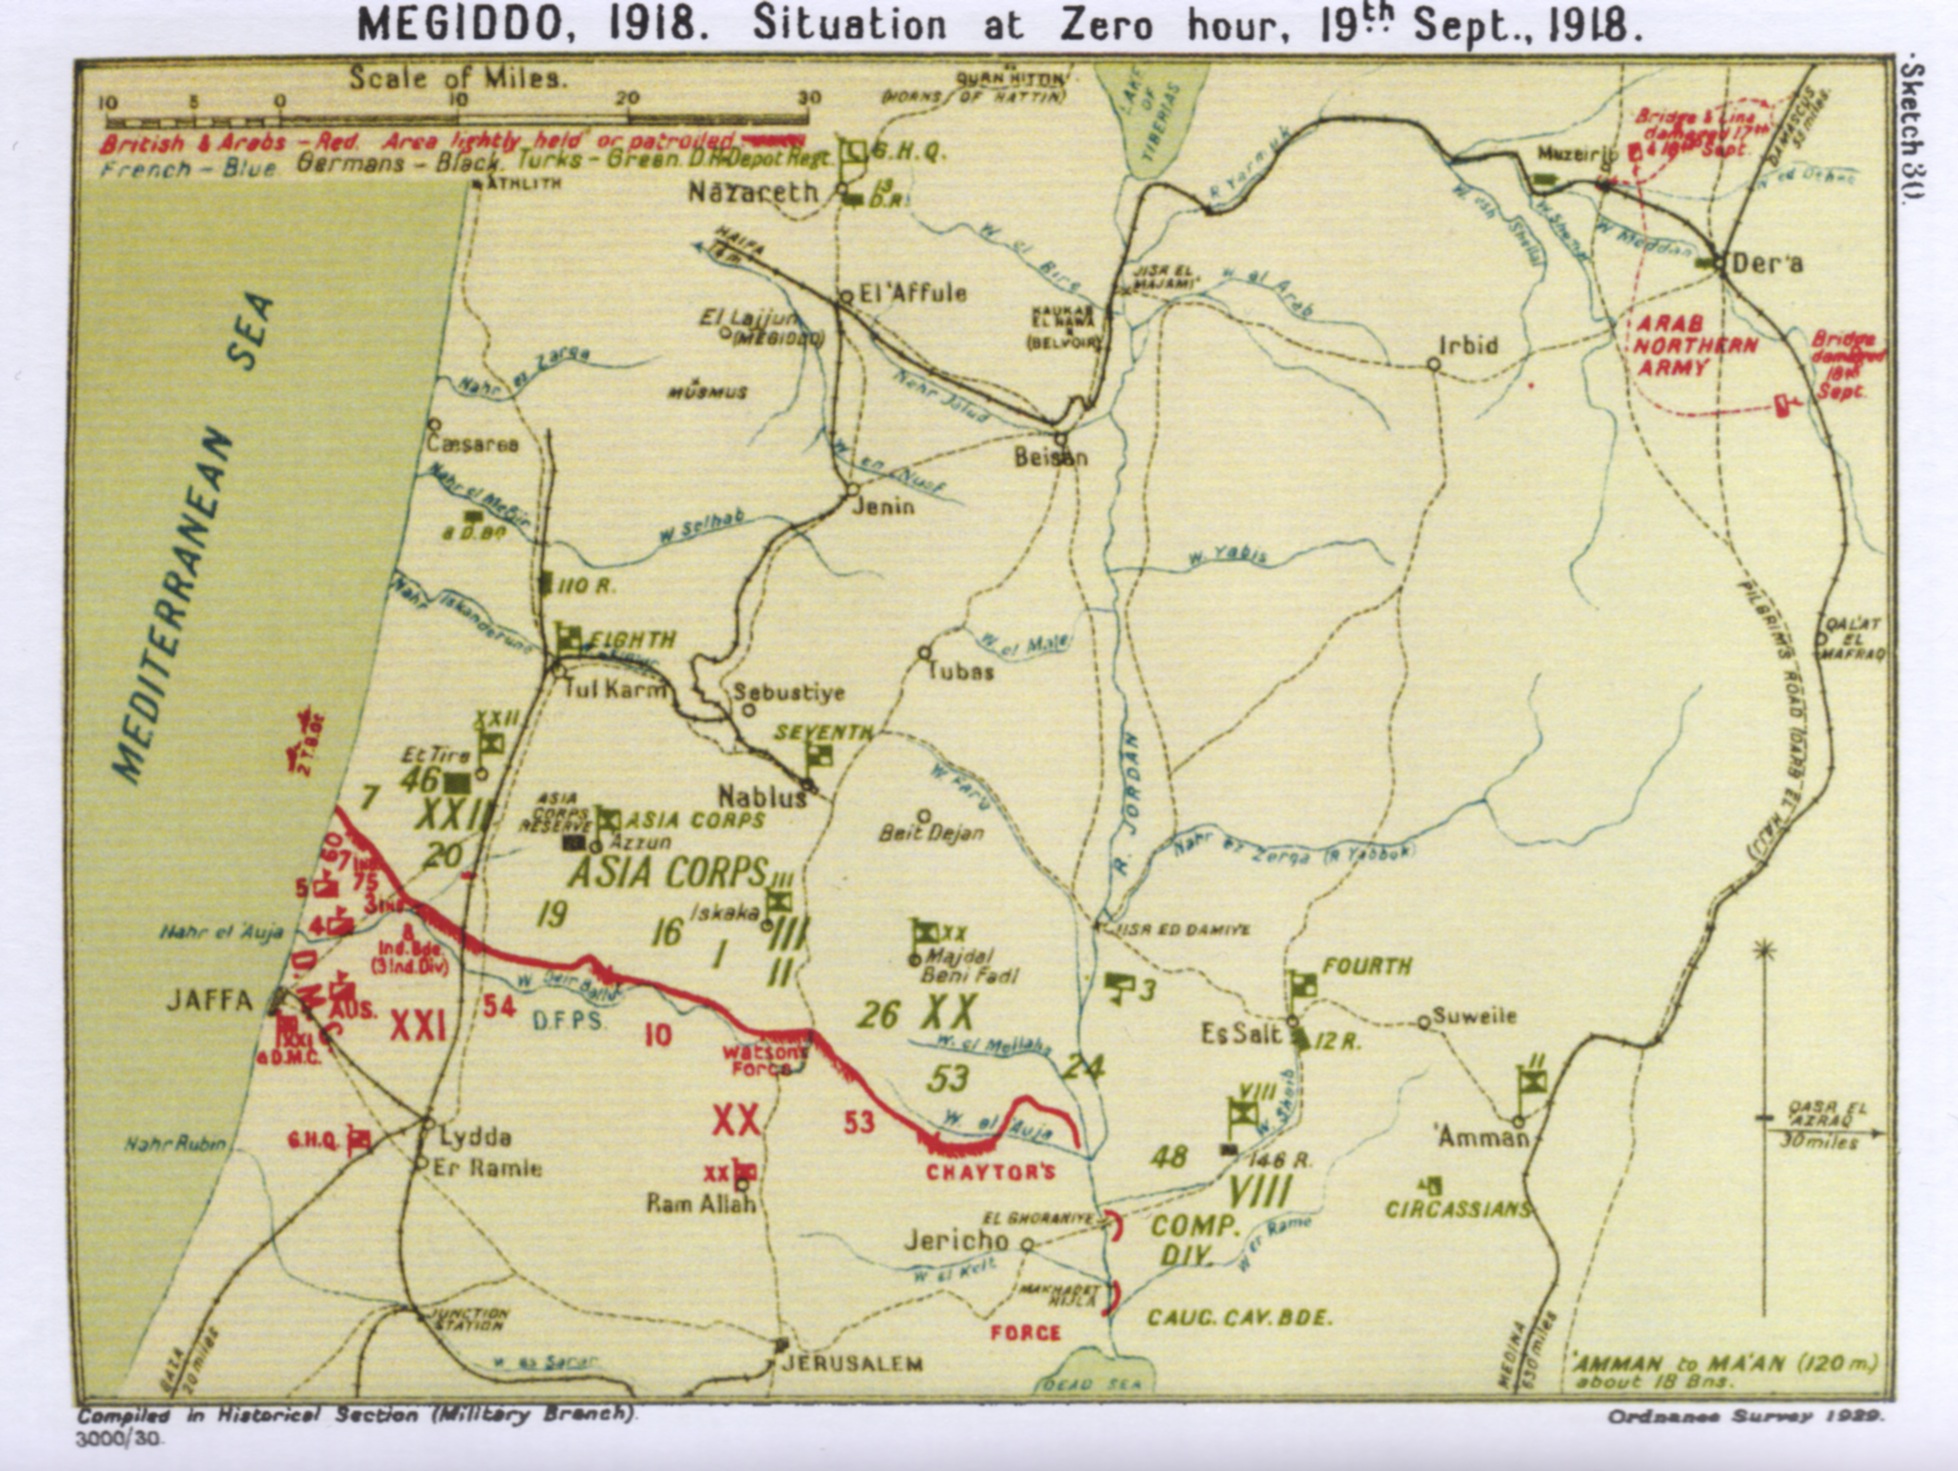
Battle of Megiddo. Sketch Map 30 Megiddo positions of armies at zero hour, 19 September 1918.
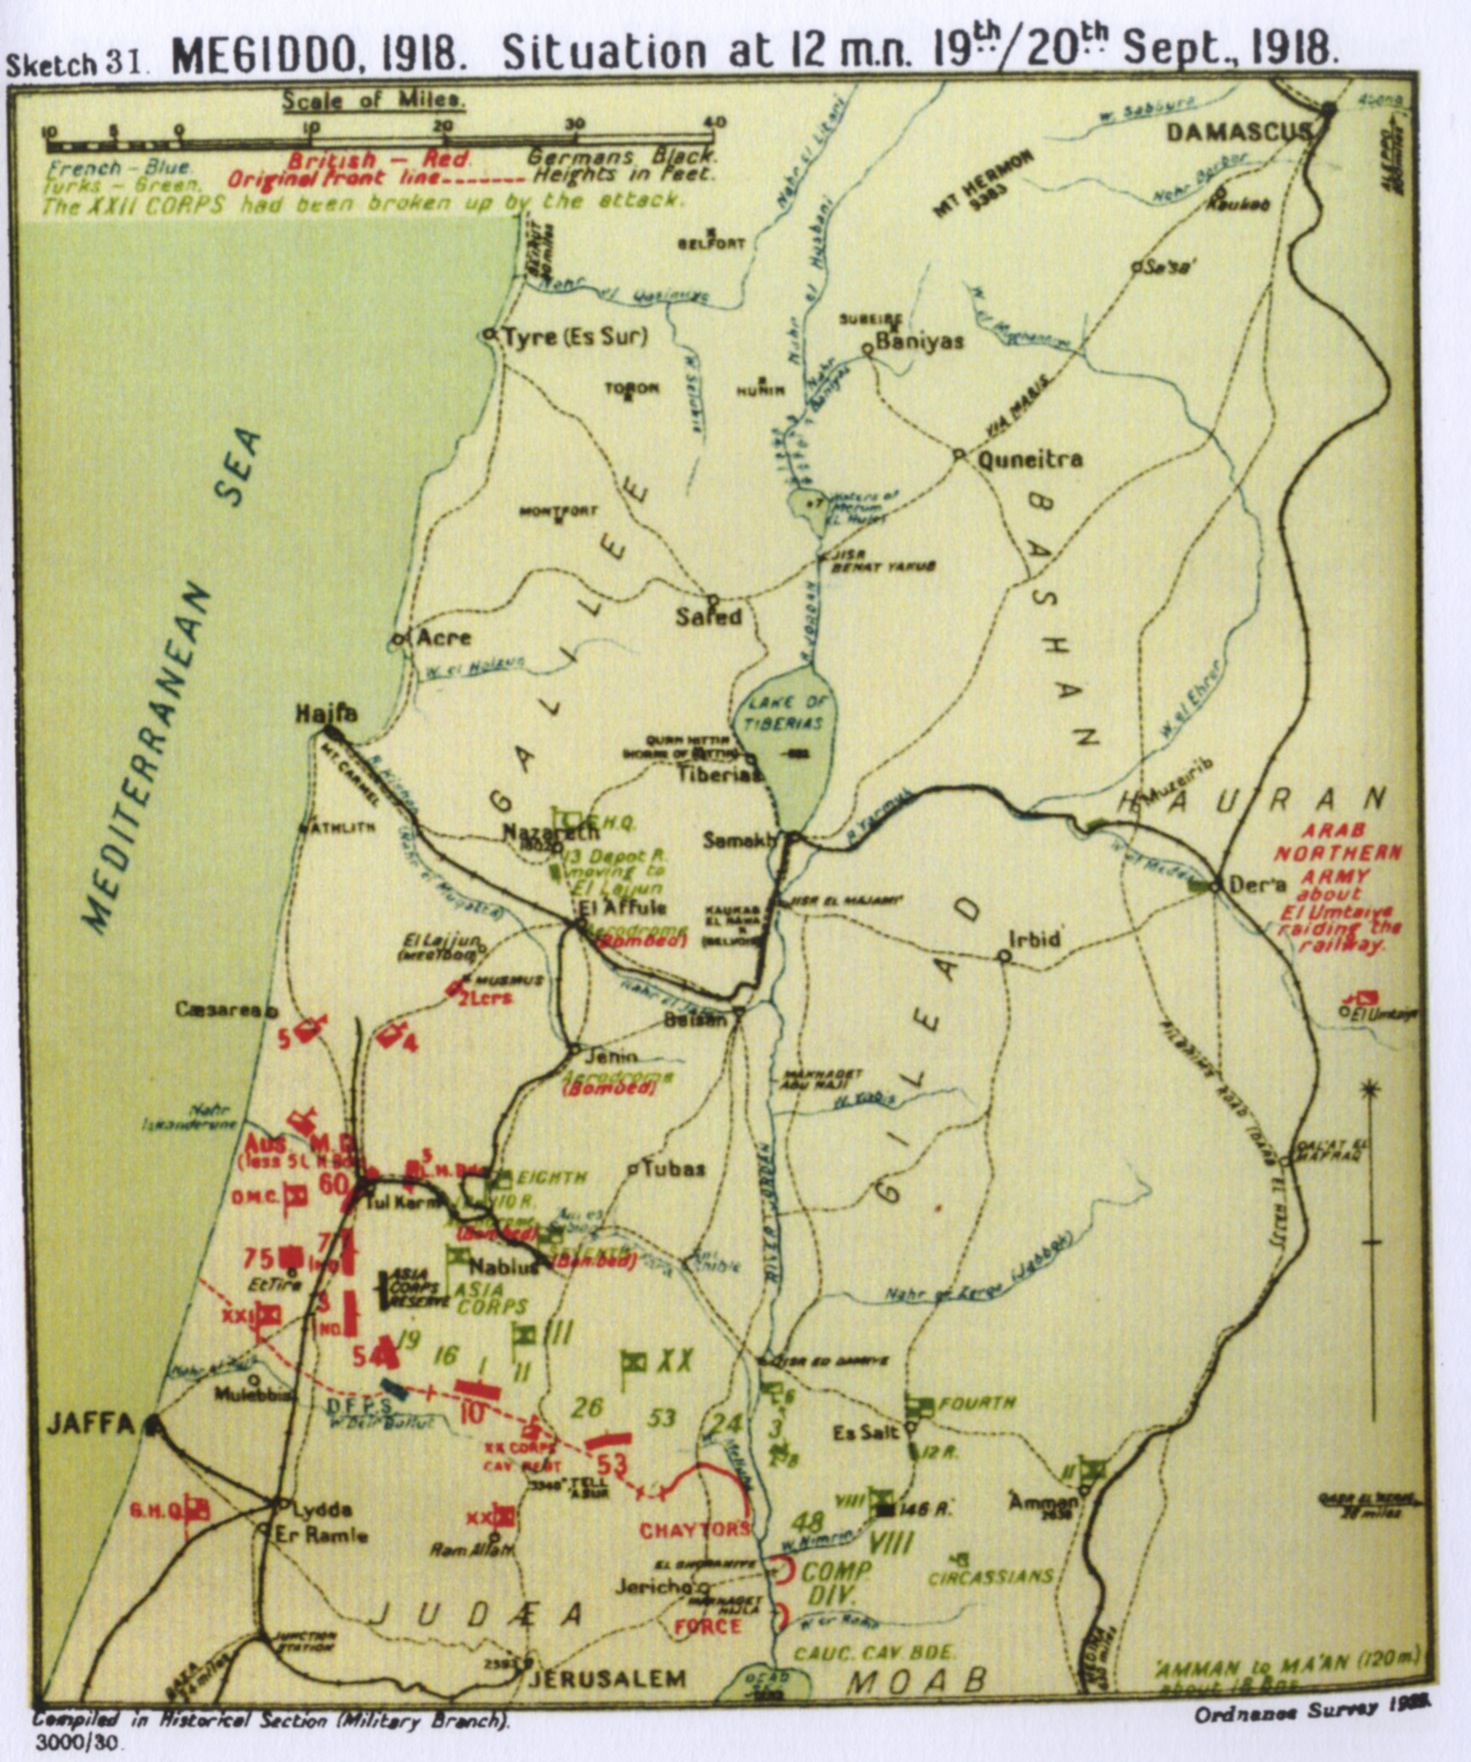
Falls Map 31. Battle of Megiddo Situation at 24:00 19/20 September 1918.
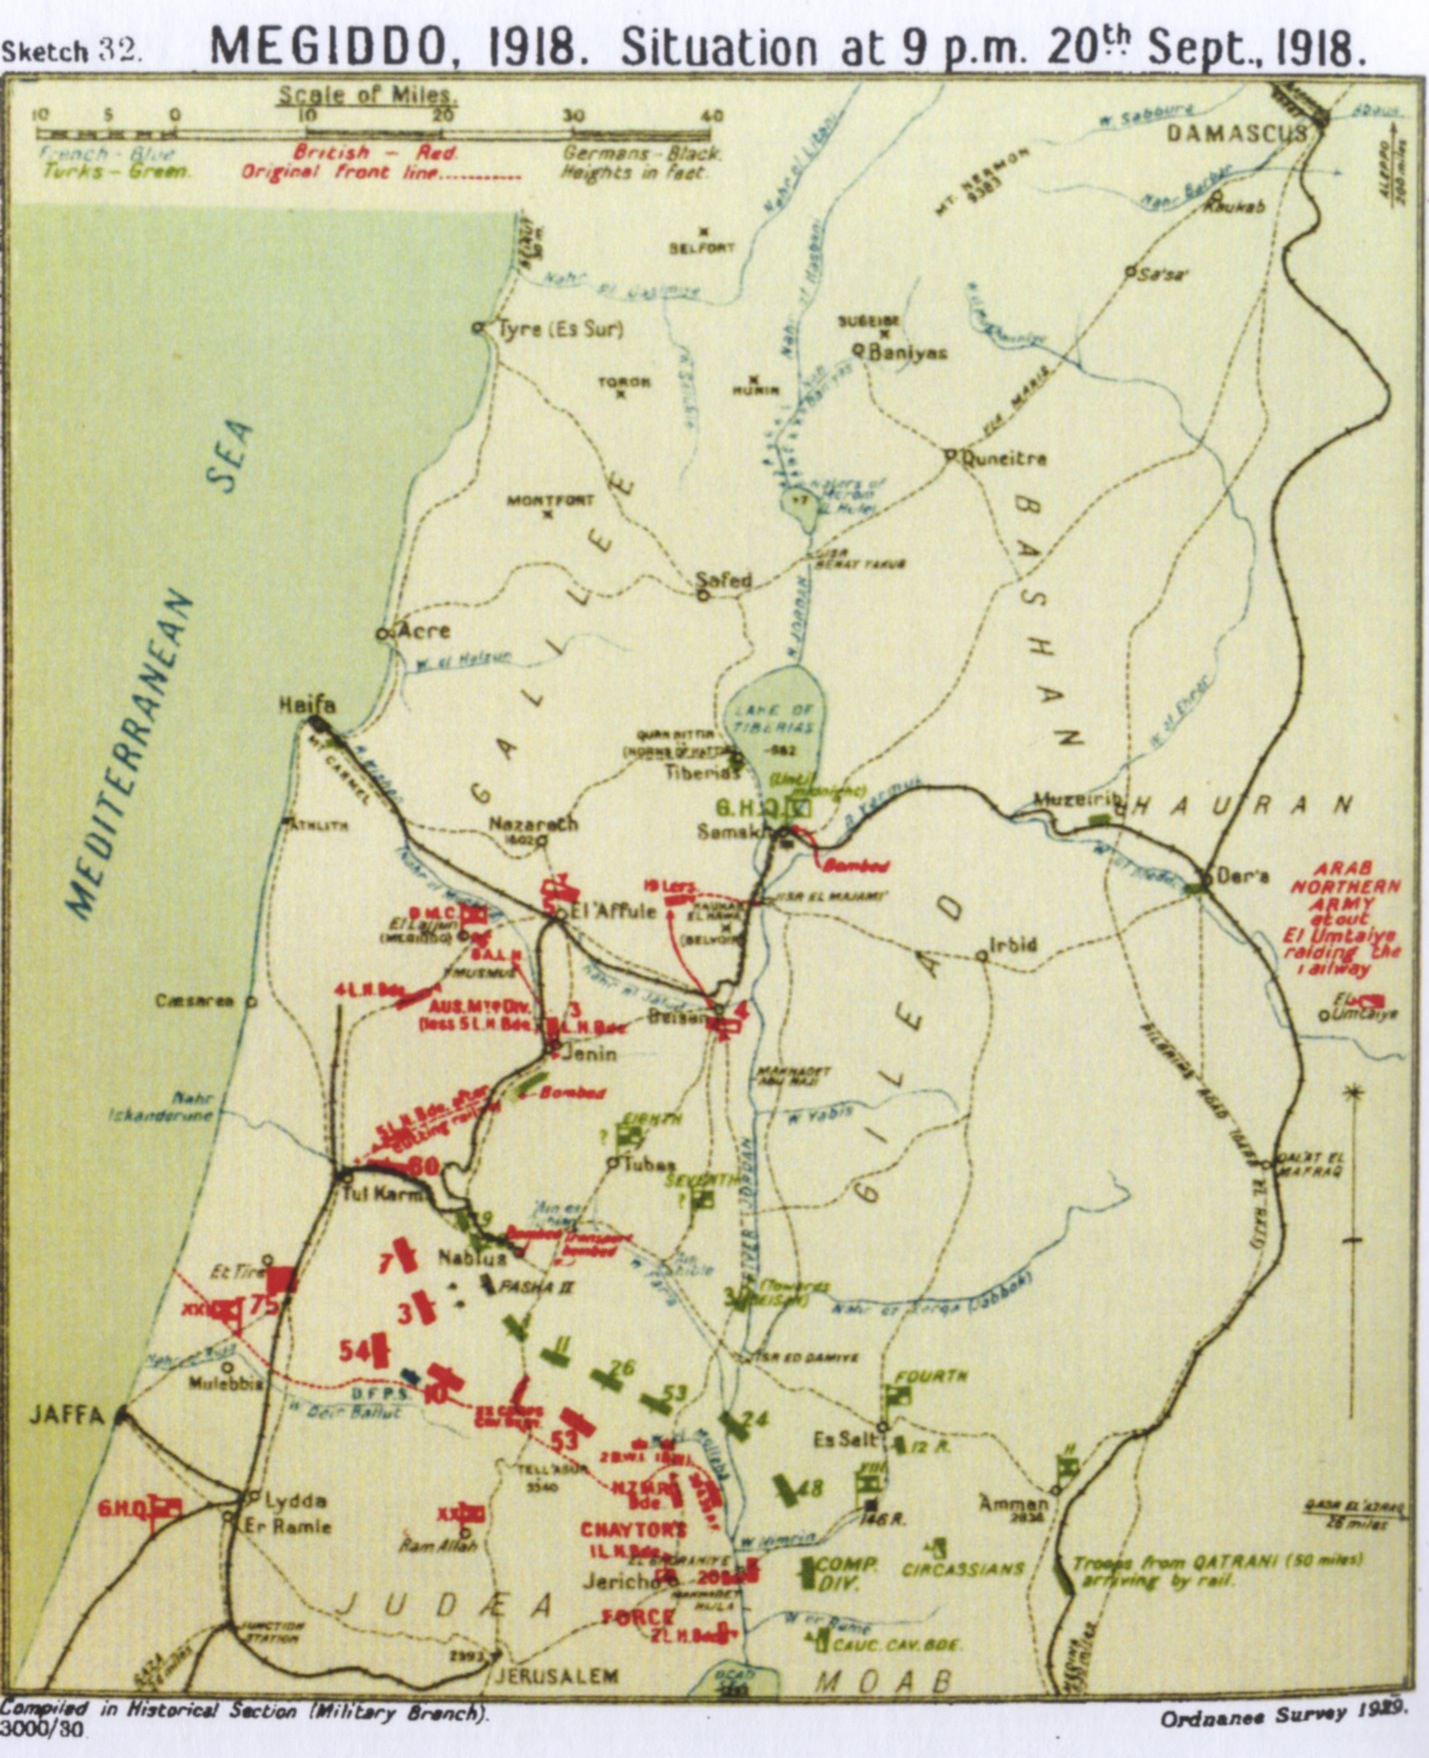
Falls Map 32. Megiddo Situation at 21:00 20 September 1918.

The Battle of Megiddo, September 1918: A Light Armoured Car patrol in the hills above Samaria.

Battles of Megiddo. 4th Cavalry Division. Transport crossing the Wadi-el-Bireh near Jisr Mejamie. Some fourteen German lorries trying to escape were bogged and abandoned here (one can be seen). It took two days to get 30 of our lorries across.

IWM caption : Battles of Megiddo. Railway Bridge over the Jordan at w:Jisr Majami, which was reached and secured intact by the 19th Lancers on September 20th, having covered some 80 miles since September 19th. (12th Brigade, 4th Cavalry Division).

Maunsell's map of the battles from 18 to 20 September 1918 at Megiddo and Sharon

Map showing the dispositions of forces at the start of the Battle of Megiddo in 1918
Historical Overview
Crushing British victory; led to the armistice with the Ottomans.
Quick Facts
British Empire
- Commander: Edmund Allenby
- Strength: ca. 69.000
- Casualties: ca. 1.500
Ottomans & Ger.
- Commander: Otto Liman von Sanders
- Strength: ca. 35.000
- Casualties: ca. 30.000
Strategic Context
Final offensive to crush Ottoman army groups.
Related Literature


Historical Locations
Interactive map requires third-party cookie consent.