Operation Compass

Italian armored vehicles heading to Sidi Barrani

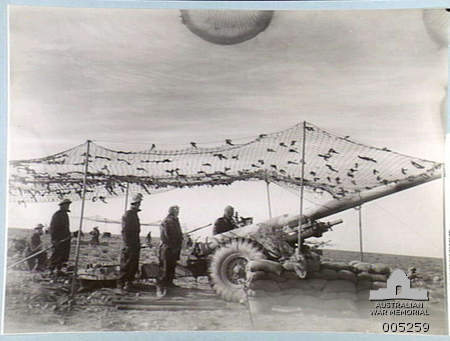
Battle of Bardia - Italian artillery firing on Allied positions during the battle

Aircraft of the Royal Air Force- Gloster Gladiator. Gladiator Mark II, N5786, of No. 3 Squadron RAAF, airborne from their landing ground near Sollum, Egypt, during the last stages of the British assault on Bardia (Operation COMPASS).

(L3/35). (The original photo is in the AWM's collection, but this image has been scanned from Operation Compass 1940: Wavell's whirlwind offensive (ISBN 0-275-98286-6) in higher resolution in order to show detail differences between the basic L3 tankette and its L3 cc variant. That's why there's no AWM's markings on the image. The AWM's summary: 1941-07. TWO CAPTURED ITALIAN CARRO VELOCE CV33 TANKETTES ON THE ROAD OVER-LOOKING BARDIA HARBOUR. BARDIA CAN BE SEEN ON THE FAR HILL. (NEGATIVE BY B.M.I.). In the book above there's also mentioned that the vehicle on left has a Solothorn (sic) 20 mm anti-tank rifle.
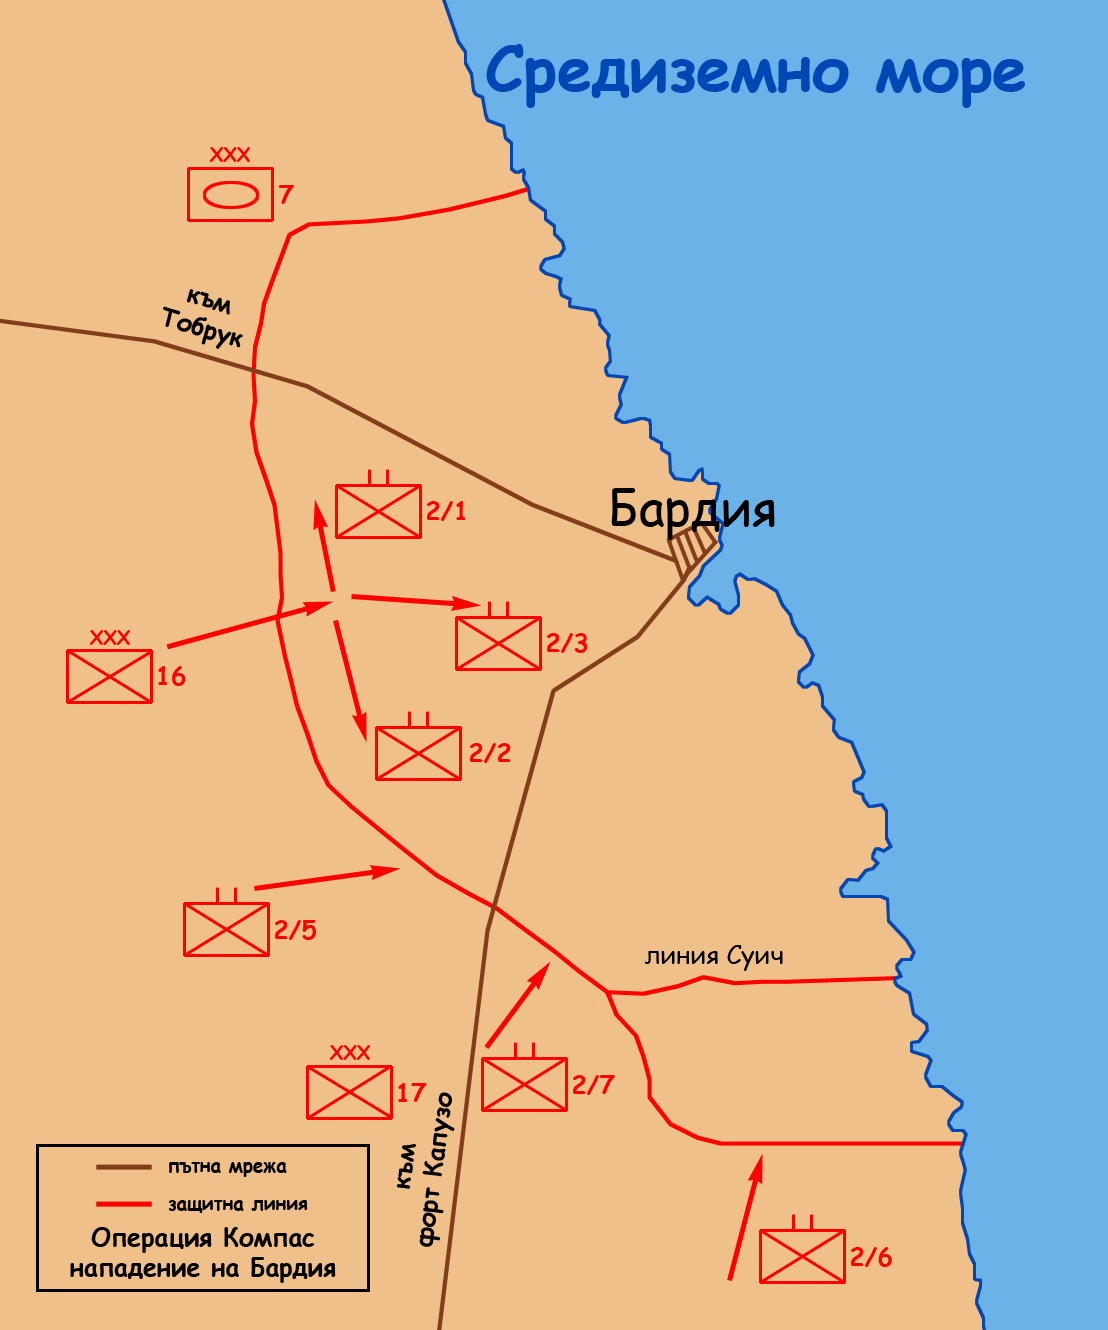
Операция Компас. Нападението на Бардия. Начало на операцията.

Операция Компас. Нападението на Бардия.

AWM caption : "1940-12-31. OFF BARDIA - TWO RATINGS OF H.M.S. "LADYBIRD" HAVE A YARN UNDER THE GUN DURING THE BOMBARDMENT OF BARDIA. (NEGATIVE BY D. PARER)." Comment : This shows the muzzle end of a BL 6 inch 50-calibre Mk XIII gun, originally mounted on HMS Agincourt (ex Rio de Janeiro).

AWM caption : "BARDIA, LIBYA. 1941-01-02. ABOARD THE HMS LADYBIRD GUNNERS LOADING ONE OF THE TWO 6 INCH GUNS OF THE GUNBOAT DURING THE NAVAL BOMBARDMENT WHICH PRECEDED THE INFANTRY ASSAULT OF THE 6TH AUSTRALIAN DIVISION ON THE ITALIAN FORTRESS. THE LADYBIRD AT THE TIME WAS UNDER ALMOST POINT BLANK RANGE OF THE HARBOUR DEFENCE GUNS. (FILM STILL)." Comment : this shows a BL 6 inch 50-calibre Mk XIII gun, originally mounted on HMS Agincourt (ex Rio de Janeiro).
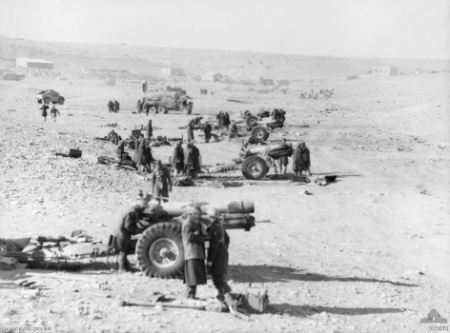
Near Bardia - One of the guns and crew of the 28th Medium Regiment. 234 Battery, Royal Artillery (D Troop) - A British unit which assisted the Australian Artillery in the Battle of Bardia. Comment : Gun appears to be a BL 4.5 inch medium field gun, on 60-pounder gun mounting. See also File:4.5 inch gun Bardia Dec 1940 AWM 005258.jpeg.
AWM caption : "TOBRUK - `A' TROOP OF BRITISH SIX INCH 26 CWT BL HOWITZERS IN ACTION AT TOBRUK."

6th Australian Division (Advanced) Headquarters Intelligence Section. L to R: Lieutenant. Colonel Rogers (GSO2 (I)) Captain D.J.H. Lovell, (Division Intelligence Officer): Capt. AJ.S. Cotter (GSO3 (I)): Captain D. Grieve; Captain R.R. Viall (Intelligence Officer) and the Intelligence Sergeant.

Egypt & Cyrenaica, Libya: Map of the Western Desert Campaign and its Operation Compass Battle Area 1941.

Bardia, Libya 29 December 1940. No. 5 gun crew, 1st Battery, "A" Troop, 2/1st Field Artillery Regiment. The gun crew comprises Sergeant Pearse, Bombardier Frankfort, Gunner Hillcoat, Gunner O'Sullivan, Gunner W. K. Smith and Gunner Krumback. This 25-Pounder Mark II is camouflaged with hessian and streamers and engaged in harassing Italian positions before the actual "push".

Tobruk, Libya, 22 January 1941. Members of C Company (mostly from 14 Platoon), Australian 2/11th Infantry Battalion, part of the 6th Division having penetrated the outer defences of Tobruk, assemble again on the escarpment on the south side of the harbour after attacking anti-aircraft gun positions. The battalion was formed in Western Australia. Left to right: Front row: Sergeant (Sgt) B Illingworth (1); Private (Pte) R L Thomas (2); Pte J A K Lang (3); Pte T McCosh (4); Corporal (Cpl) W Pauley (5); Pte N Duff (6); Lance Corporal E Patten (7); Pte T Lenton (8); Warrant Officer 2 J Wilson (9) partly obscured. Middle Row: Unknown, partly obscured (10); Pte D McDermid (11); WX802 Pte W Currell (12) (wounded in action (WIA)); WX259 Lieutenant K T Johnson (13) (WIA); Pte D Rogers (14) (WIA); WX2459 Cpl Arthur Norman Ellis (15); Pte E Pell (16); Cpl N R Doyle (17); WX1013 Pte C Brown (18) (killed in action (KIA)). Back row: Pte H H Sadler (KIA) (19); Pte C Cobbin (WIA) (20); Pte L Robartson (21); Pte K H (or W H) Cormack (22); WX1030 Cpl D Brand (23) (WIA) (later Sir David Brand, Premier of WA); Pte C. F. Kealley (24); Pte N R Dann (25) (KIA); Pte J W (or C T) McDonald (26); Cpl G Mercer (27); Pte H W King (WIA) (28); Pte F Graffin (29) (KIA); Pte G Rees (30). (Photographer Frank Hurley.)
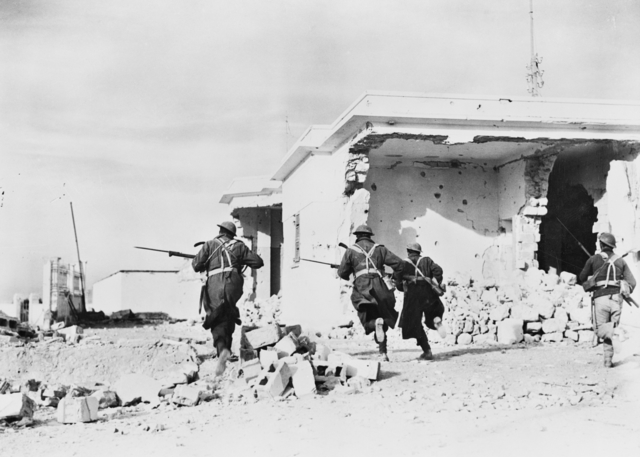
Troops from the Australian 2/2nd Infantry Battalion rush through the streets of Bardia

Australian troops advancing Into Bardia.
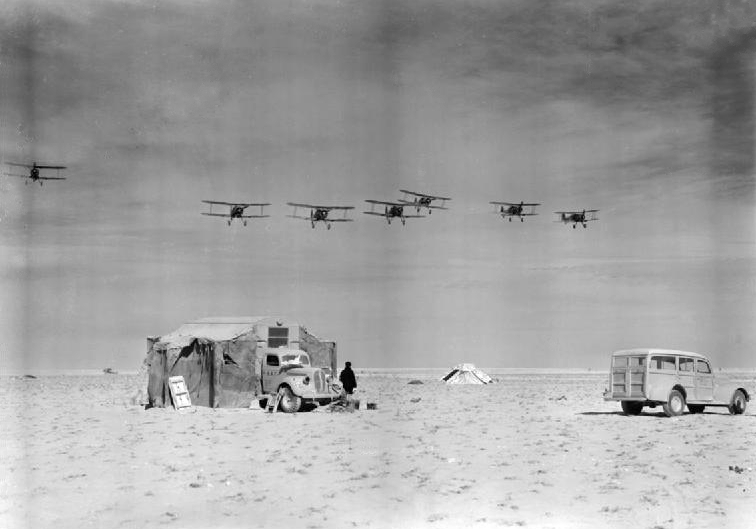
Seven Gloster Gladiators of No. 3 Squadron RAAF make a low pass in loose line abreast formation over the Squadron's mobile operations room at their landing ground near Sollum, Egypt, from which they operated during "Operation Compass". The aircraft were returning from a patrol over Bardia. The squadron's mobile operations room is in the left foreground.

Near Bardia - One of the guns and crew of the 28th Medium Regiment. 234 Battery, Royal Artillery (D Troop) - A British unit which assisted the Australian Artillery in the Battle of Bardia. Comment : Gun appears to be a BL 4.5 inch medium field gun, on 60-pounder gun mounting. See also File:4.5 inch gun Bardia Dec 1940 AWM 005259.jpeg.
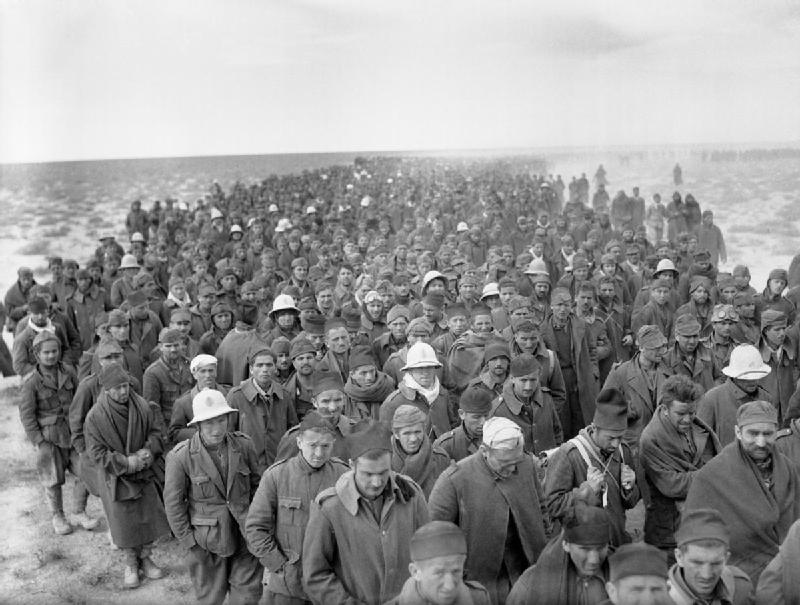
A column of Italian prisoners captured during the assault on Bardia, Libya, march to a British army base on 6 January 1941.

British 7.2-inch howitzer crew in action during the attack on Bardia.

AWM caption : DERNA, LIBYA, 1941-01. BRITISH MEDIUM ARTILLERY READY FOR THE ATTACK. Comment : This appears to be a BL 4.5 inch gun on a 60-pounder gun carriage.

Invasión italiana de Egipto (9-16/9/1940).

Invasione Italiana dell'Egitto nel giugno del 1940.
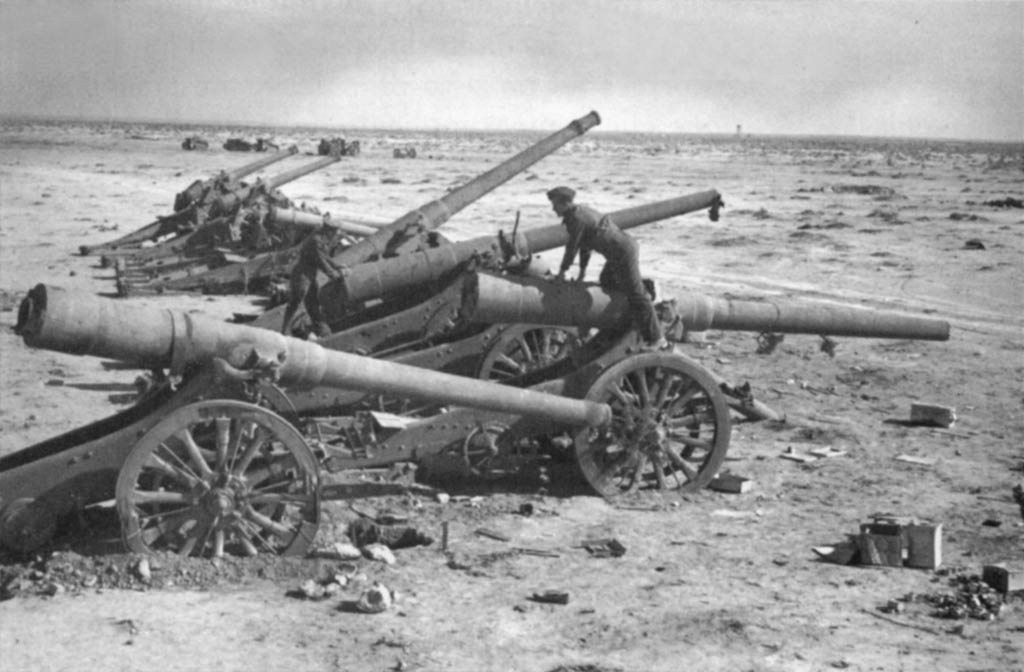
Italian battery of 149/35 and 120/25 guns captured by the British during the 1940-1941 winter offensive in Cyrenaica

Italian prisoners resting after a long march are guarded by the crew of a Bren gun carrier in the Western Desert, 16 December 1940.
Historische Übersicht
Britische Gegenoffensive; Vernichtung der italienischen 10. Armee.
Fakten auf einen Blick
Großbritannien
- Befehlshaber: Richard O'Connor
- Truppenstärke: 36000
- Verluste: ca. 1.900
Italien (10. Armee)
- Befehlshaber: Rodolfo Graziani
- Truppenstärke: 150000
- Verluste: 130000
Strategischer Kontext
Abwehr der italienischen Invasion Ägyptens.
Weiterführende Literatur


Historische Orte
Die interaktive Karte erfordert die Zustimmung zu Drittanbieter-Cookies.